Create Virtual Machine in ESX 5.5
Create Virtual Machine in ESX 5.5 -----
Prerequisites -----
> ESX 5.5 Server.
> Installed VMware 5.5 client software on desktop machine.
Steps to Create Virtual Machine -----
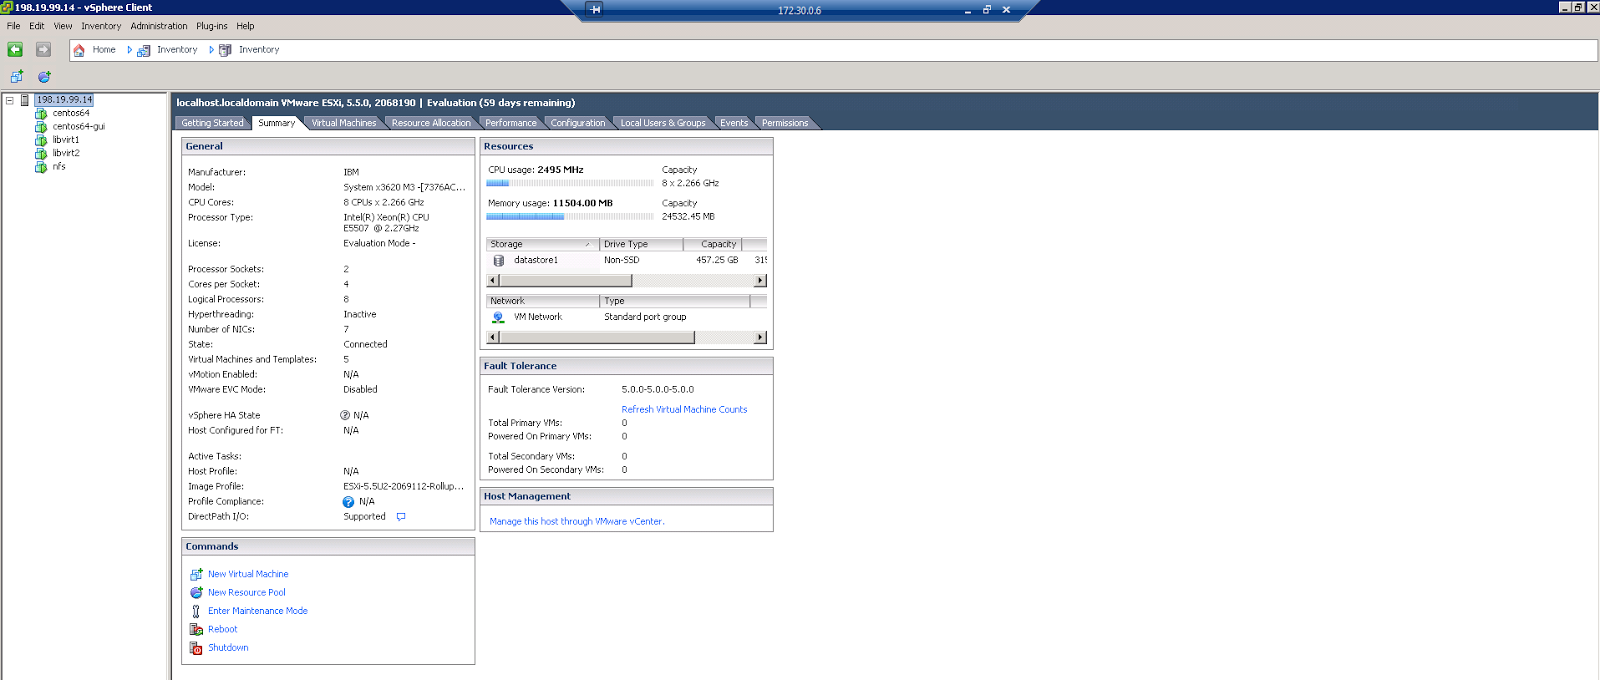
> Loging to VMware Client 5.5 with ESX user id and password.
> Once logigng to the VMware client. You will get the following screen.
Select the ESX Server IP / Hostname in left side panel.
> Right click to ESX Host server IP / Hostname and select option New Virtual Machine...

> In Configuration window select Custom option and click Next to continue.

> Give the name to virtual machine and click Next to continue.

> Select Datastore to store virtual machine files and click Next to continue.

> Select Virtual Machine Version: 8 and click Next to continue.
Note :- Virtual Machine Version 8 supports only ESX 5 and above version. If you are using ESX 4 servers in your network than select Virtual Machine Version: 7.

> Select Guest Operating System: type and Version from down menu. Click Next to continue.

> Select Number of virtual sockets: and Number of cores per virtual socket: for Virtual Machine and click Next to continue.

> Select Memory Size: for Virtual Machine and click Next to continue.

> In Create Network Connections window select no of NICs and in Network - Adapter select Virtual switch and Adapter type and click Next to continue.

> In SCSI Controller window select SCSI controller type and click Next to continue.

> Select Create a new virtual disk option and click Next to continue.

> Select Disk Size: capacity , Disk Provisioning type for Virtual Machine and click Next to continue.

> Select Virtual Device Node and click Next to continue.

> Select option Edit the virtual machine settings before completion and click Continue.

> In Edit Virtual Machine window select New CD/DVD (adding) option and select Datastore ISO File option. Click on Browse... button.

> Double click on datastore1.

> Select .iso file of the OS which you want to install on Virtual Machine.
Note :- First I have uploaded .iso files on ESX 5.5 local datastore.

> Select Connect at power on option and click on Finish button.

> Select Virtual Machine and click on Power (Play) button to on the machine.

> Select Console option to view the Virtual Machine screen. In the following screen CentOS 6 OS installation started.

EOF
Prerequisites -----
> ESX 5.5 Server.
> Installed VMware 5.5 client software on desktop machine.
Steps to Create Virtual Machine -----
> Loging to VMware Client 5.5 with ESX user id and password.
> Once logigng to the VMware client. You will get the following screen.
Select the ESX Server IP / Hostname in left side panel.
> Right click to ESX Host server IP / Hostname and select option New Virtual Machine...
> In Configuration window select Custom option and click Next to continue.
> Give the name to virtual machine and click Next to continue.
> Select Datastore to store virtual machine files and click Next to continue.
> Select Virtual Machine Version: 8 and click Next to continue.
Note :- Virtual Machine Version 8 supports only ESX 5 and above version. If you are using ESX 4 servers in your network than select Virtual Machine Version: 7.
> Select Guest Operating System: type and Version from down menu. Click Next to continue.
> Select Number of virtual sockets: and Number of cores per virtual socket: for Virtual Machine and click Next to continue.
> Select Memory Size: for Virtual Machine and click Next to continue.
> In Create Network Connections window select no of NICs and in Network - Adapter select Virtual switch and Adapter type and click Next to continue.
> In SCSI Controller window select SCSI controller type and click Next to continue.
> Select Create a new virtual disk option and click Next to continue.
> Select Disk Size: capacity , Disk Provisioning type for Virtual Machine and click Next to continue.
> Select Virtual Device Node and click Next to continue.
> Select option Edit the virtual machine settings before completion and click Continue.
> In Edit Virtual Machine window select New CD/DVD (adding) option and select Datastore ISO File option. Click on Browse... button.
> Double click on datastore1.
> Select .iso file of the OS which you want to install on Virtual Machine.
Note :- First I have uploaded .iso files on ESX 5.5 local datastore.
> Select Connect at power on option and click on Finish button.
> Select Virtual Machine and click on Power (Play) button to on the machine.
> Select Console option to view the Virtual Machine screen. In the following screen CentOS 6 OS installation started.
EOF


Comments
Post a Comment